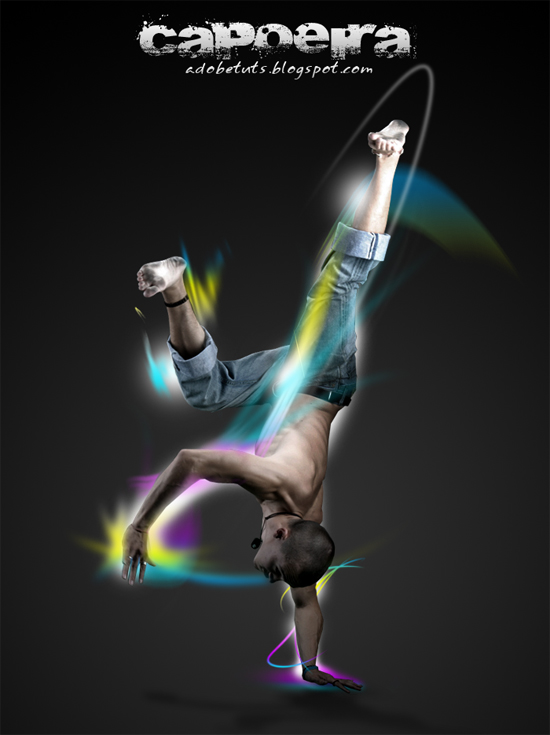
Download the photo above here : http://b-e-c-k-y-stock.deviantart.com/art/Chandar-5-35969106
Brushes here : http://www.ramesstudio.com/adobetuts/sparkling_brushes.zip
PS: It's actually a dance pose called "Capoeira" from Brazil. I'm sure you guys've seen it before. Pretty unique stock photo, that's why I choosed this one.
Step 1

Create a new document with the size of : 700px (width) and 900px (height). Fill it with black color and create a new layer on top of it. Select the "Brush tool"and choose grey color and click on the new layer you've created (at the bottom part just like above)
Step 2

Cut out the model's photo from the background using the cutting tools
Step 3

Paste it on to document. We need to create a shadow for the model. To do so, drag the model layer to the "new layer" icon.
Step 4

You'll get something like this. Now click on the bottom model layer and click on the "Layer Style" icon on the bottom part of the layer.
Step 5

Once the small window popup, under the "Color overlay" choose the blend color to black and click ok.
Step 6

Go to Edit> Free Transform> Distort and rotate/ distort the model layer just like above.
Step 7

Next, go to Filter> Blur> Gaussian Blur. Set the blur radius to "5.8" and click "ok"
Step 8

You've now created the shadow. choose the model photo (the one above the shadow) and go to Image> Adjustments> Hue and Saturation. Set the saturation slider to "-50" and click "ok"
Step 9

Now is the best part! Click on the "Brush tool" and click on the small arrow. Locate the brushes you've just downloaded (See brush download link above). Choose "Unreal_Brushes_v_4_by_Edelihu.abr" for now.
Step 10

Once you've done that, you'll see few brushes listed in the brush list. Choose any one of it (depends on your creativity, don't have to follow mine). Create a new layer before you paint.
Step 11

Click on the photo using that brush. You'll see something like above image. If you find the brush is not aligned with the model, go to "Edit> Free Transform". Rotate the brush till you're OK with the position. Now we need to color the brush. Click on the "Layer Style" button. Next, see "Step 12".
Step 12

Choose "Gradient Overlay". Click on the gradient bar, and a small window will popup. Set any color tones you prefer and click OK.
Step 13

Can see the results? Now, using the "Eraser Tool" too brush off the highlighted parts above, so that it looks like the motion effect is actually moving around the model's body. This is a repeating step. Go and choose other brush shapes you've downloaded and repeat Step 11 - Step 13. Remember to create new layer for each brush effect, so that you don't mess up the other layers.
Step 14

Once you've created the effects, its time to add some glow effects around the model. Make new layer below the model photo.
Step 15

Select "Brush tool" with the color white and click on the parts shown above to create the "shinning effects".
Coolness! You're done!

Here's another sample using this same steps but a little extra effect. Remember my photo manipulation tutorials? Yup! I've combined that tutorials with this one to come up with this!

What do you think? Do let me know.
Thanks and please try ya !

15 comments:
i just found your site a few days ago and i really like what you've done so far
this one's really great as well...keep it going
rames....dis one very deep...do u think i can do it? haha...
Anonymous>> thanks alot for ur visit and comments :)
kokahkok>> ahaha try see! very very easy :)
nice one.. never tried the glow curves.. its just a brush that produce that effect
wah, nice one lar!!
Hi great effect very simple process if you Familiar with Ps tools
Hey men, i'm from Colombia , South America, and let me tell You.. whata great Page and TUT's YOu have HERE>> CONGRATZ!!!!!
i would have thought you would superimpose your face on the body... =P
excellent blog with so many tutorials for noobies like me. Keep up the good work :)
thanks for the tutorial mate... i've tried....
great eye catching effect nice.
an athlete and an artist
not a very good artical, only copy, but not good.
Since pandora Jewelry gold accessories are trendy, stock up on golden hoop pandora sale earrings, long necklaces with fashionable pendants, and pandora charms rings with prominent centerpieces. cheap pandora charms Women’s accessories make your personality and creativity shine. pandora charms sale Update your look and pay attention to what you want your pandora charms 2010 look to be. Express yourself and put your personal discount pandora charms style to the fore through these catchy accessories and fashion finds. pandora charm They spice up any dress and give you that radiant glow.Costume Jewelry.Pieces of costume jewelry really fashion forward pieces that can make you stand out. They are beautifully crafted with stones pandora sale charms of different kinds, beads of various colors, and fashion forward styles. Costume jewelry may look a little too much when paired with a dress that already stands out. In order to balance the look, make sure to wear one with a simple dress or top.Handbags are charm bracelet pandora every woman’s best friend. Functional and aesthetically appealing, these fashion accessories come in different styles these days. Don’t just go for the generic black leather bag.
Excellent adobe photoshop tutorial, it's perfect because I'll achieve hose movements just making some changes and clicks in the program.
Post a Comment